- Published on
Create your own plugin for neovim.
- Authors

- Name
- Abhinas Regmi
- @AbhinasRegmi
Introduction
It started with a frustation. I couldn't find a single plugin that fitted my usecase. The plugin I had earlier couldn't do this one single thing. I searched and searched, found nothing. A thought came to me, I am a developer why don't I try to make this thing myself. I know right 🤓 (classic).
Now, I had this thought of how should my ideal plugin behave. It was easy since my requirements were not so vast. I started my journey and was stamping my keyboard for hours and It finally happened, my new and shiny plugin working just the way I wanted.
Today we will be creating a similar plugin for neovim written in lua. Don't panic if you don't know lua (I still don't).
What features will the plugin have ?
- Detect file type (using the extension for sure)
- Detect variables and inject variables into templates
- Collect content present around the cursor or the mouse
- Run the code content selected
- Create a new buffer to display the output
- Finally format the output to be displayed
Why are we creating these features ? The thing is I want to create a plugin that will execute the code I am hovering over (curl). I want multiple curl request to be present in a file and execute the one under my cursor. Also I want to make use of variables so that I don't have to repeat the url or the tokens. Finally I want to view the output in a separate window.
Now let's get started.
Basic structure of a plugin
Hmm, what does a plugin have ? Plugin are simple thing just some function that run when an event happens. Example: Run the code below my cursor when I click certain shortcuts.
For now lets create something that will print hello fams when a shortcut is pressed.
Initally, create a file as ~/.config/nvim/lua/customplugin.lua. The name (customplugin) is the name of our plugin It can be anything like myawesomeplugin, punisher as you wish. Now a plugin returns an object (in js terms) of methods and you expose these methods outside which can later be called as we wish.
-- inside ~/.config/nvim/lua/customplugin.lua

local M = {}

function M.greet()
	print("hello fams")
end

return M
Now your plugin is ready. Easy right. You just have to import this in your init.lua and start using it. I want to bind this plugin to <leader>he. So when I press <leader>he it should show "hello fams" in the command line.
-- in your ~/.config/nvim/init.lua
vim.keymap.set('n', '<leader>he', ":lua require('customplugin').greet()<CR>", { desc = 'Execute my custom plugin' })
Now we are ready to test this. Reload you nvim and press <leader>he. You should see this in the command.
Always reload nvim after plugin changes to see its effect

Detect the file type
The real work starts now. Create a local function called GetFileName that will check the current focused buffer and get the file name and extract the extension using the regex. You can call this function from your greet to see the output.
-- in your customplugin.lua

local M = {}

local function GetFileName()
  local file_name = vim.api.nvim_buf_get_name(0)
  local ext = file_name:match '^.+%.(.+)$'
  return ext
end

function M.greet()
  extension = GetFileName()
  print(extension)
end

return M
When you run the previously set key bidings <leader>he you will get the following output. The file name for my case is first.txt. You can see the extension txt in the command.

Detect and inject variables
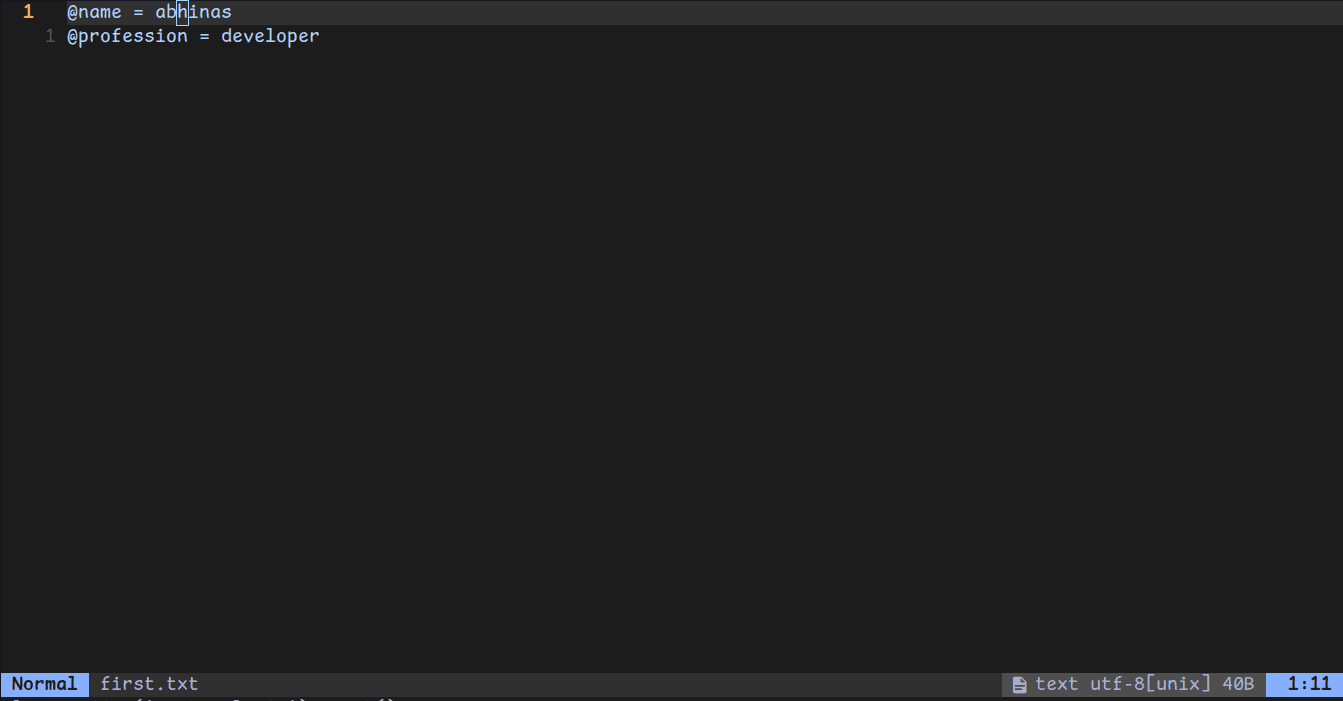
Now we would like to define variables that can be later reused. We will define variables with @<varname> = <variable value> at the top of the file. And detech {{<varname>}} inside strings and replace it with the <variable value> during execution.
local function GetAllVariables()
  local lines = vim.api.nvim_buf_get_lines(0, 0, -1, false)
  local variables = {}

  for _, line in ipairs(lines) do
    local key, value = line:match '^@([%w_]+)%s*=%s*(.+)$'
    if key and value then
      variables[key] = value
    else
      -- Stop parsing when the first non-variable line is encountered
      break
    end
  end

  return variables
end

local function ReplaceStringVariables(input)
  local variables = GetAllVariables()

  -- Replace patterns like {{username}} with the corresponding value
  return (input:gsub('{{(.-)}}', function(key)
    return variables[key] or error 'Variable ' .. key ' not found'
  end))
end

function M.greet()
  local out = GetAllVariables()

end
Now let's see an example of creating variables. There is no easy way of showing the replacement of variables in string right now. But we will see that in action later.
Collect content around cursor
This is the most important stuff. What do I mean by collect the content around the cursor ? I want to get all the text inside some delimeter.
for example.
###

this is the content

###
I should be able to get this is the content when I use keybinding present inside ### and ###. Now the delimeters can be anything. I will use ### as the delimeter. You can change this and make corresponding changes in the code. We will also replace the variables with there value when they are present inside the delimeters.
For this create a function Trim that will remove empty lines and a function GetContentBetweenHash to get the content.
local function Trim(s)
  return (s:gsub('^%s*(.-)%s*$', '%1'))
end

local function GetContentBetweenHashes()
  -- Get the current cursor position
  local cursor_pos = vim.api.nvim_win_get_cursor(0)
  local current_line = cursor_pos[1] - 1 -- 0-based index

  -- Get all lines in the file
  local lines = vim.api.nvim_buf_get_lines(0, 0, -1, false)

  -- Find the start of the first '###'
  local start_line = -1
  for i = current_line, 1, -1 do
    if lines[i]:match '^%s*###' then
      start_line = i
      break
    end
  end

  -- If no start block found, return an empty string
  if start_line == -1 then
    error 'Cannot find delimeter'
  end

  -- Find the end of the next '###'
  local end_line = -1
  for i = current_line, #lines do
    if lines[i]:match '^%s*###' then
      end_line = i
      break
    end
  end

  -- If no end block found, return an empty string
  if end_line == -1 then
    error 'Cannot find delimeter'
  end

  -- Collect the content between the '###' blocks
  local content = {}
  for i = start_line + 1, end_line - 1 do
    if not (Trim(lines[i]) == '') then
-- Replace the variable names with variable values
      table.insert(content, ReplaceStringVariables(lines[i]))
    end
  end

  return table.concat(content, '\n')
end

function M.greet()
  local output = GetContentBetweenHashes()
  print(output)
end
Well that is a lot of lines. What we essentially did for GetContentBetweenHashes is:
- Find the current
cursorposition. Traverse upwardsfrom cursor position and find delimeter.- If upward delimter found record the delimeter line else error out.
- Now
traverse downwardfrom current cursor position and find delimeter. - If downward delimeter found record the delimeter line else error out.
- Now loop from
upwarddelimeter line todownwarddelimeter line remove empty lines andreplacethe variables - Concat all the lines with
newlineand create a single string.
What is the result from this you say.
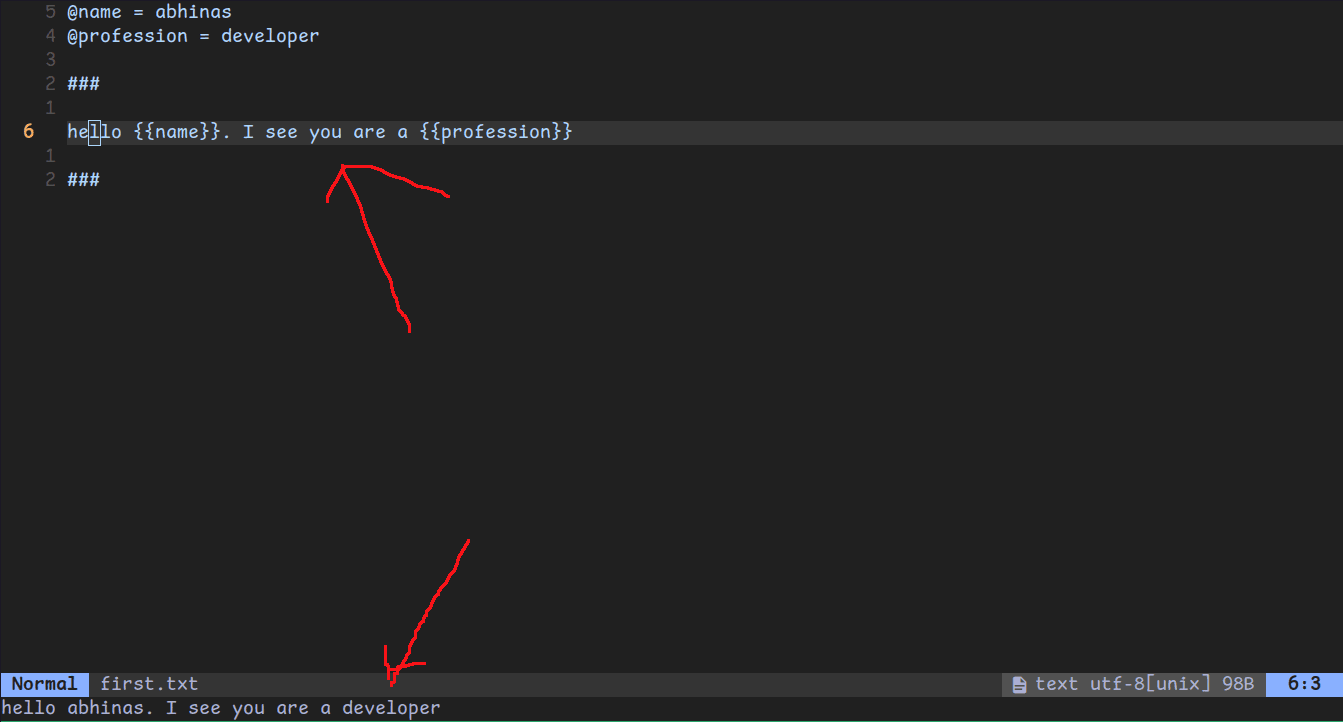
TaDaaa 😁. You can see the content between delimeters have been extracted and the variables have been replaced with their corresponding values.
Run the selected code
Now, we will try to write some bash inside the delimeter and get the output. We will use echo bash function that will just echo its parameters to the terminal.
Now create following functions.
local function RunSelectedCode()
  if GetFileName() == 'http' then
    local command = GetContentBetweenHashes()
    local commandOutput = vim.fn.system(command)
    print(commandOutput)
  end
end

function M.greet()
  RunSelectedCode()
end
We didn' use the GetFileName function until now. We will check for the file extension .http and only execute the code in terminal if it matches .http extension. I have created a .http file and pasted the follwing.
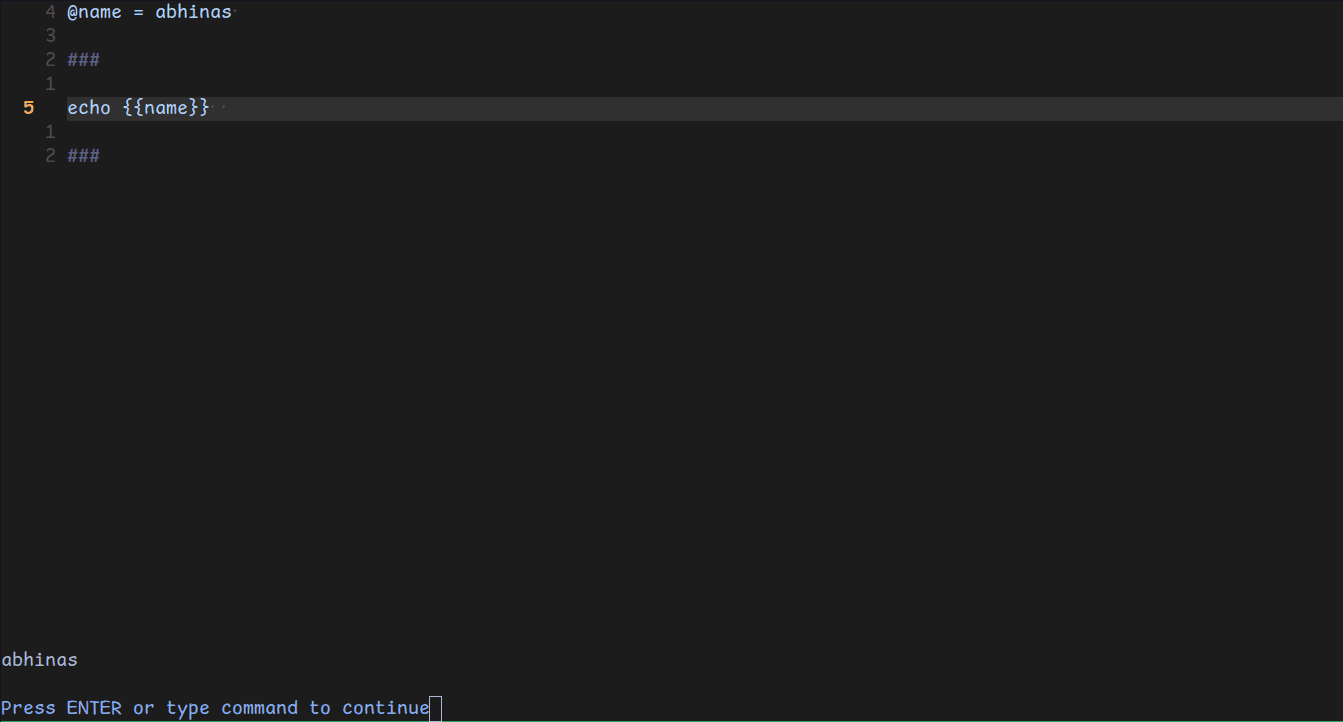
We can see the output of the echo command with replaced variable here.
Create a split buffer
Everything looks good for now. But I don't like to view my output in the small space at the bottom. How about we split the window in two and display the output there.
Create the follwing function to achieve split window.
function SplitWindowAndFocus(hashcontent)
  -- split window vertically
  vim.cmd 'vsplit'
  -- open a new empty buffer
  vim.cmd 'enew'

  -- get the buffer name
  local newBuff = vim.api.nvim_get_current_buf()

  -- set name for the buffer
  -- warning if a named buffer is already opened and you want to create
  -- same buffer again it will through an error
  -- you can disable this but it is difficult to close an unamed buffer you have to suffix with !
  vim.api.nvim_buf_set_name(newBuff, 'custompluginbuffer')

  -- write to the buffer
  vim.api.nvim_buf_set_lines(newBuff, 0, -1, false, vim.split(hashcontent, '\n'))

  -- move the cursor to new split
  vim.cmd 'wincmd l'
end

local function RunSelectedCode()
  if GetFileName() == 'http' then
    local command = GetContentBetweenHashes()
    local commandOutput = vim.fn.system(command)

    -- display in new split buffer instead of the command
    SplitWindowAndFocus(commandOutput)
  end
end
Now when we test the above code. Tadaaaaa🤌🤌
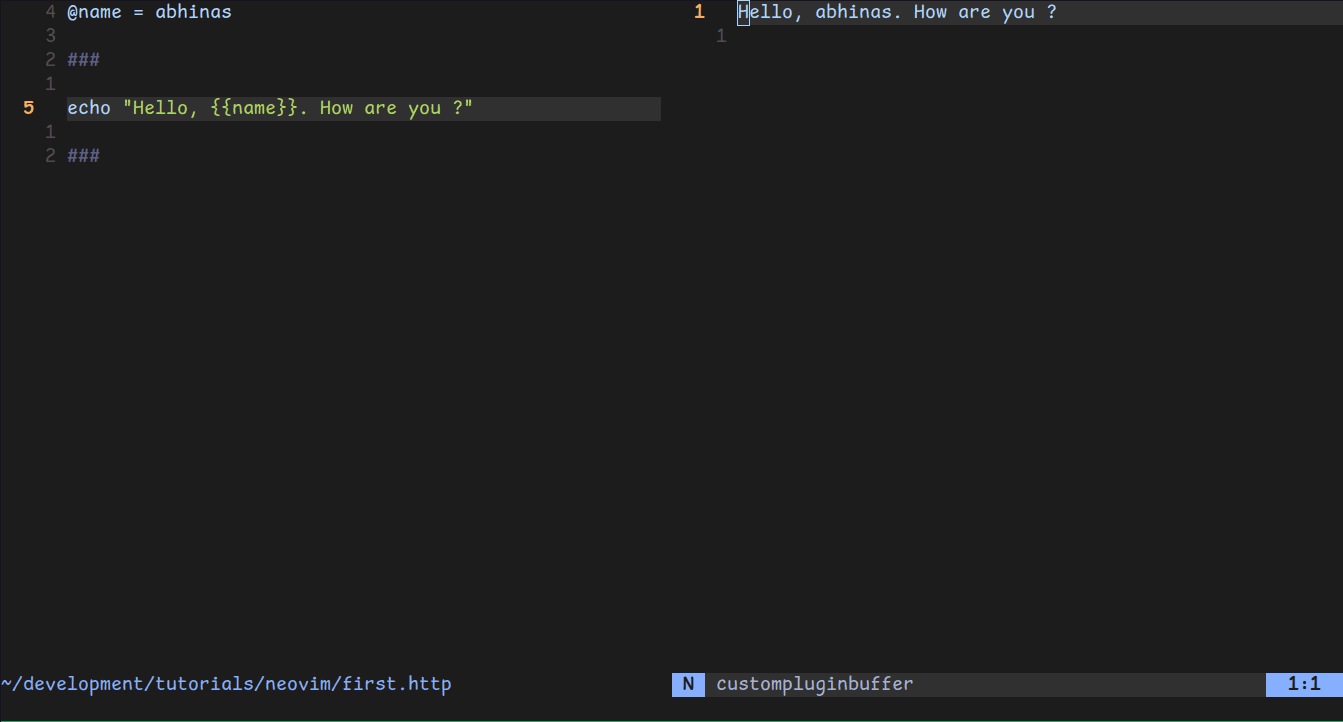
You can see the custom buffer name custompluginbuffer at the new window. And the code output in the window. Phewww we are almost there.
Formatting
For this section make sure curl and jq is installed in your system. The primary reason to create this plugin was for me to run curl commands on my API server. The plugin I used earlier used .http syntax and didn't allow multipart/form-data data to be sent. But I knew curl could easily do that. We will be using a public api for testing here.
We will be making a GET request to a public dog api using curl.
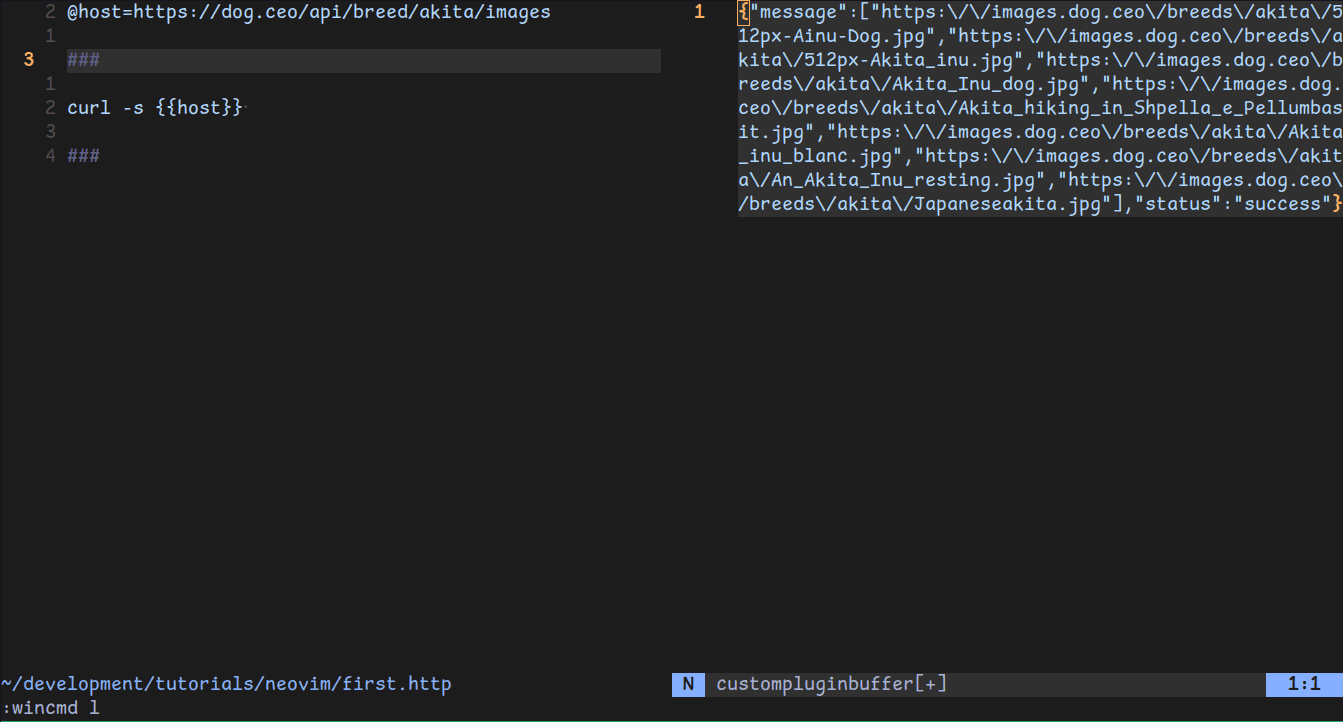
Woow It looks like shit 💩. See that's why we need a formatter. The formatter we will be using is jq. You need to make following changes to your RunSelectedCode function.
local function RunSelectedCode()
  if GetFileName() == 'http' then
    local command = GetContentBetweenHashes()
    local commandOutput = vim.fn.system(command)
    -- format the output json
    local formattedOutput = vim.fn.system(string.format("echo '%s' | jq .", commandOutput))

    SplitWindowAndFocus(formattedOutput)
  end
end
After updating the function with formatter we will observer the following.
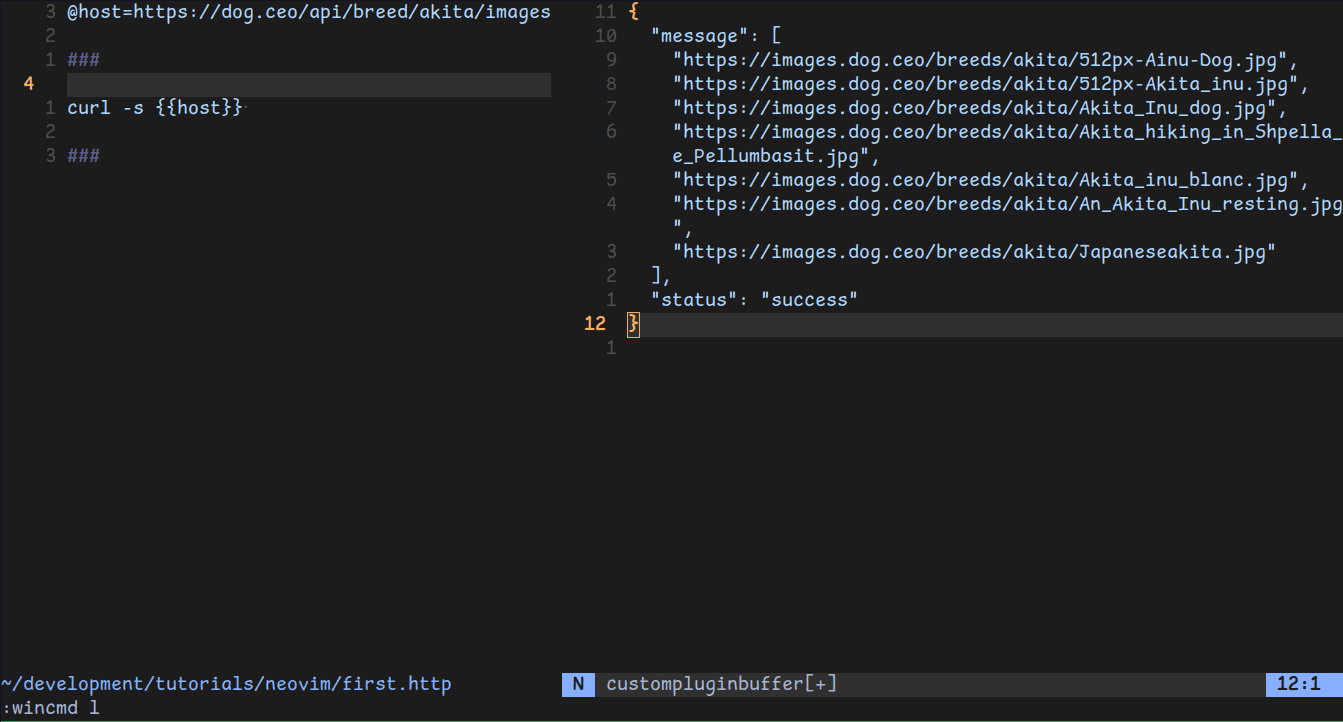
See there is no need to follow the exact steps that I took here. I needed to view the json output in a prettier way so I had to use a formatter.
Conclusion
See it is not so hard to create a plugin to make your developmental workflow easier. You should be able to create plugins for your own needs now. You can now change the greet function that is used in keybinding according to your wish. I leave that as your homework.
I hope you enjoyed this article.
Keep searching and Keep learning. Happy Coding 💩💩